So, I've decided to take my work back underground, to stop it from falling into the wrong hands.
Friday, August 7, 2020
Saturday, July 3, 2010
HVAC Check Valve Update
I was able to fix the check valve flap functionality with some plastic off an old fruit container I found in the recycle bin.
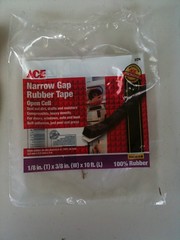
I improved the seal around the junctions with weather stripping available from your local hardware store. For the big gap I found some foam meant to seal the gap around window air conditioners. I installed it with duct tape. Red Green would be proud.
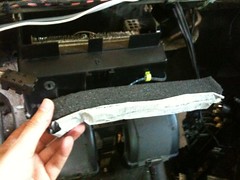
For the rest, regular adhesive-backed stuff worked fine.
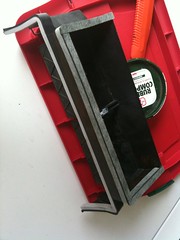
The darker stuff is 1/8" thick and is proving useful in several areas.
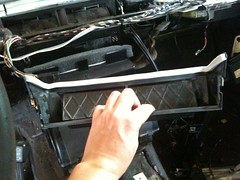
Here are some close ups of the finished product.
Note how the 1/8" stuff sits nicely in the clips above!
I improved the seal around the junctions with weather stripping available from your local hardware store. For the big gap I found some foam meant to seal the gap around window air conditioners. I installed it with duct tape. Red Green would be proud.
For the rest, regular adhesive-backed stuff worked fine.
The darker stuff is 1/8" thick and is proving useful in several areas.
Here are some close ups of the finished product.
Note how the 1/8" stuff sits nicely in the clips above!
Thursday, June 3, 2010
Next HVAC part

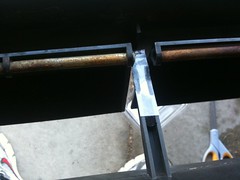
There's his goofy check valve contraption that needs to go on top of the A/C housing that will mate up with the ductwork beneath the dashboard once the dashboard is back on. It's hard to see in the photo, but there are a couple of flaps with counter-balances on them that open and close depending on the air pressure around them. When the fresh air blower is on (it sits on top of the firewall and above these flaps) the flaps close, keeping the air from blowing down into the A/C housing. When the A/C blower is on (below the flaps) it will blow the flaps opened and push the air through the ductwork beneath the dashboard.
In theory.
Mine has been around so long that the flaps pop out of their hinges and get stuck opened.
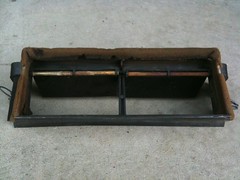
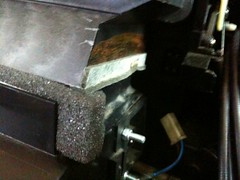
There's also the disintegrating foam issue. As you can see below, the piece doesn't seem to be designed to sit flat on top of the A/C assembly.
I'm going to have to replace the piece of foam that used to be in there - I'm pretty sure it's the piece in the photo in my previous post.
Next time, I'll show you how I wound up getting this back together.
Some day I'll get to the electronics, I swear!
Monday, May 31, 2010
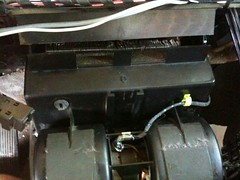
HVAC Assembly
Seemingly simple jobs that take more than 1 day to do deserve a blog post.
I finally got the cover to this A/C blower assembly back on. The trick is getting it aligned in the back first. Then use vice grips to clamp the thing together while you get the clips back on.
Benefits of taking this off:
1) I was able to clean it out
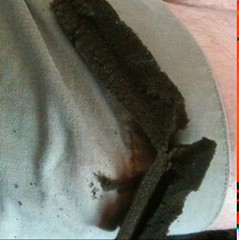
2) I also replaced some sound insulation inside of it. The old stuff literally turned to dust when I touched it... Like this stuff:
Time for a break.
I finally got the cover to this A/C blower assembly back on. The trick is getting it aligned in the back first. Then use vice grips to clamp the thing together while you get the clips back on.
Benefits of taking this off:
1) I was able to clean it out
2) I also replaced some sound insulation inside of it. The old stuff literally turned to dust when I touched it... Like this stuff:
Time for a break.
Monday, May 3, 2010
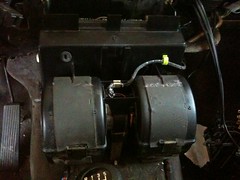
Ventilation FAIL
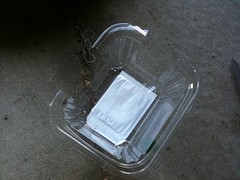
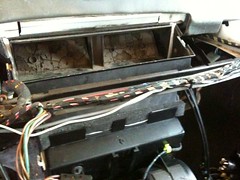
I tore into my dashboard trying to find a rattle that occurs around 3000rpm in any gear... But only when the car is moving. I'm not sure I have it nailed yet, but I got plenty of junk out of the ventilation system! The main culprits keeping the air flow flaps from opening and closing were the pencil and mint candy in the photograph below. Next weekend I'll take the car for a short drive and see if the noise is gone.

Monday, April 5, 2010
CAN overview
Teaching digital data communication to auto repair types is beyond the scope of this blog, but I'm going to try to present some basic information below to help people without a computer background figure things out, and I'll include some links for those wanting to read further. This stuff I write below will be in the context of adding CAN to a vehicle -- debugging and repairing a newer car that already has CAN in it is probably close to impossible without the right tools and/or information that only the designers have.
CAN stands for Controller Area Network, this in contrast to a Storage Area Network (SAN) used to network disk drives and servers, or a Local Area Network (LAN) used to network general-purpose computers (e.g. your PC) in a room or small building. In an automotive application, CAN is allowing us to replace wiring harnesses carrying what are effectively analog signals with pairs of wires carrying digital signals. We can combine multiple functions -- that used to require separate sets of wires -- onto a single pair of wires, reducing the amount of wiring required in the car. Engineers call this multiplexing.
The cost of potentially reduced wiring is increased control complexity. We have to introduce CAN nodes near the stuff we want to monitor (switches, sensors, etc) and control (light bulbs, electric motors, fuel injectors, etc.) The CAN nodes will have CAN controllers and transceivers (which may be chips separate from the controller, or they may be combined) in order to talk on the network as well as a microcontroller to oversee things. The software running on the microcontroller makes performing more advanced functions very easy; for example, we can program it to roll down our window all the way if we hold down the switch for 1s or something along those lines. Without a microcontroller, we'd need an awkward collection of timers and switches to pull this off. We could also have preset positions for our seats and mirrors -- something I wouldn't attempt with the 1983 technology currently in the car.
...or, more to the point, what's connected to ours?
I good starting point would be some of the chassis electronics since they're what I'm having trouble with in my car. Long term, I'd like the network to be able to handle the stuff below.
CAN is a 1-bit wide network. Computer network folks like the OSI model, which divides the functions of a network into layers where the lowest level is the Physical Layer. In our case, this layer includes the wires connecting the CAN nodes and the transceivers connected to those wires. The physical layer is intentionally left out of the CAN specification -- it can include, for example, copper wires or fibre-optic cable at whatever bit rate -- but we're probably going to wind up with twisted pair. For our chassis electronics, I'm going to run it as slow a possible in order to keep things simple.
CAN doesn't talk about 1s and 0s when it talks about bits. Instead there are 'dominant' and 'recessive' bits. This accounts for situations where multiple CAN nodes are driving data onto the network simultaneously - if one node drives the dominant value and another drives the recessive value, the dominant value wins. The node driving the recessive value can see this, recognize that it has lost arbitration (it is, by definition, lower priority,) and stop transmitting data.
Bits are grouped into frames and CAN supports 4 frame types. If you're really interested in the details here, check out one or more of the links below. The point I want to get across here is about the data in the frames: CAN nodes use the network to broadcast information about themselves. For example, a node watching the transmission might broadcast a message indicating that the car is in reverse, or a node watching the controls around the steering wheel might broadcast a message indicating that the driver turned on the windshield wipers. All other nodes on the network see this broadcast, whether it pertains to them or not, and it's each node's job to filter out the messages that they aren't interested in.
Here are some links you can check out if you'd like to learn more about CAN.
Automotive CAN Diagnostics at aa1car.com: a little lighter weight than my text above and it has pictures!
Controller Area Network on Wikipedia
CAN Specification 2.0 (PDF)
Atmel Microcontrollers for Controller Area Network (PDF)
What is CAN?
CAN stands for Controller Area Network, this in contrast to a Storage Area Network (SAN) used to network disk drives and servers, or a Local Area Network (LAN) used to network general-purpose computers (e.g. your PC) in a room or small building. In an automotive application, CAN is allowing us to replace wiring harnesses carrying what are effectively analog signals with pairs of wires carrying digital signals. We can combine multiple functions -- that used to require separate sets of wires -- onto a single pair of wires, reducing the amount of wiring required in the car. Engineers call this multiplexing.
The cost of potentially reduced wiring is increased control complexity. We have to introduce CAN nodes near the stuff we want to monitor (switches, sensors, etc) and control (light bulbs, electric motors, fuel injectors, etc.) The CAN nodes will have CAN controllers and transceivers (which may be chips separate from the controller, or they may be combined) in order to talk on the network as well as a microcontroller to oversee things. The software running on the microcontroller makes performing more advanced functions very easy; for example, we can program it to roll down our window all the way if we hold down the switch for 1s or something along those lines. Without a microcontroller, we'd need an awkward collection of timers and switches to pull this off. We could also have preset positions for our seats and mirrors -- something I wouldn't attempt with the 1983 technology currently in the car.
What's connected to the network?
...or, more to the point, what's connected to ours?
I good starting point would be some of the chassis electronics since they're what I'm having trouble with in my car. Long term, I'd like the network to be able to handle the stuff below.
- Power door locks
- Power windows and power window lock
- Driver door lock heater
- Power mirrors
- Headlights (low and high beams), running lights
- Blinkers, reverse lights and license plate lights
- Windshield wipers
- Windshield washer fluid pump
- Dome lights
- some other stuff that I forgot
- (Note to self: leave room for power seats for those that have them)
- Most importantly, Active Check control, which includes various bulb-out indicators and engine fluid level check lights. I'm going to start with active check control because it's completely unreliable in my car.
How is it all connected together?
CAN is a 1-bit wide network. Computer network folks like the OSI model, which divides the functions of a network into layers where the lowest level is the Physical Layer. In our case, this layer includes the wires connecting the CAN nodes and the transceivers connected to those wires. The physical layer is intentionally left out of the CAN specification -- it can include, for example, copper wires or fibre-optic cable at whatever bit rate -- but we're probably going to wind up with twisted pair. For our chassis electronics, I'm going to run it as slow a possible in order to keep things simple.
CAN doesn't talk about 1s and 0s when it talks about bits. Instead there are 'dominant' and 'recessive' bits. This accounts for situations where multiple CAN nodes are driving data onto the network simultaneously - if one node drives the dominant value and another drives the recessive value, the dominant value wins. The node driving the recessive value can see this, recognize that it has lost arbitration (it is, by definition, lower priority,) and stop transmitting data.
What data is transmitted?
Bits are grouped into frames and CAN supports 4 frame types. If you're really interested in the details here, check out one or more of the links below. The point I want to get across here is about the data in the frames: CAN nodes use the network to broadcast information about themselves. For example, a node watching the transmission might broadcast a message indicating that the car is in reverse, or a node watching the controls around the steering wheel might broadcast a message indicating that the driver turned on the windshield wipers. All other nodes on the network see this broadcast, whether it pertains to them or not, and it's each node's job to filter out the messages that they aren't interested in.
Still hungry?
Here are some links you can check out if you'd like to learn more about CAN.
Automotive CAN Diagnostics at aa1car.com: a little lighter weight than my text above and it has pictures!
Controller Area Network on Wikipedia
CAN Specification 2.0 (PDF)
Atmel Microcontrollers for Controller Area Network (PDF)
Friday, March 12, 2010
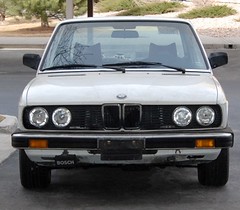
About the car
My project car is a 1983 BMW 533i. I don't have the CARFAX report handy, but I remember that it was originally sold to someone in San Diego, made it's way east to Texas and possibly Oklahoma before winding up in Missouri where my friend bought it. Obviously not in her right mind, she drove it to Fort Collins, Colorado with a smoke plume behind it as oil leaked out of the rear main seal onto the exhaust and burned off! We towed it to my garage in 2003.
"The 533i was the fastest sedan sold in the USA in 1983." - Wikipedia
Today, it's only the fastest when I'm trying to get home before the engine quits or something else threatens to leave me stranded on the side of the road!

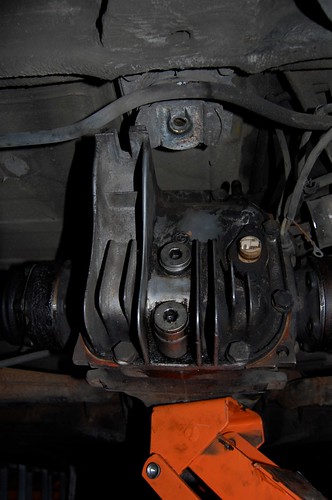

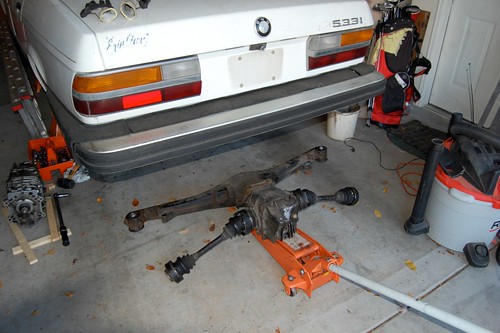
...and here's the new diff with the subframe and half shafts attached, ready to go back into the car:
"The 533i was the fastest sedan sold in the USA in 1983." - Wikipedia
Today, it's only the fastest when I'm trying to get home before the engine quits or something else threatens to leave me stranded on the side of the road!
Features/specs
The E28 page on Wikipedia gives a good overview of the basics of the E28 series - E28 refers to the chassis on which a number of BMWs were built in the 80s. Some of my favorite features in this car are:
- The 3.3L inline 6-cylinder engine. Man, do these things run smooth, even with 300k miles on them. (and a little work)
- Rear wheel drive. It may not be the safest in the snow, but at least it's fun!
- 5-speed manual transmission
- 4-wheel disc brakes
- Goofy computer and electronic stuff everywhere. More on this later.
My car also has a couple of upgrades taken from an M535i
- Getrag 265 transmission (the one with the removable bell housing)
- 3.73 limited slip differential
These along with the 533i flywheel -- which is the lightest (non-custom) one available for this series of cars -- and manual seats... well, it's a light e28 with an aggressively-geared drive drain and it makes other people try to talk me into racing it.
Work that's already done
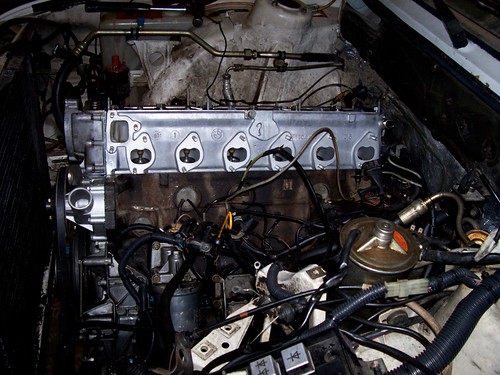
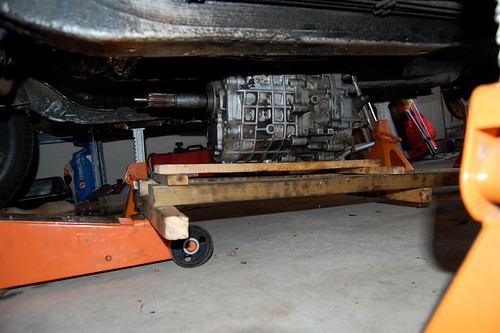
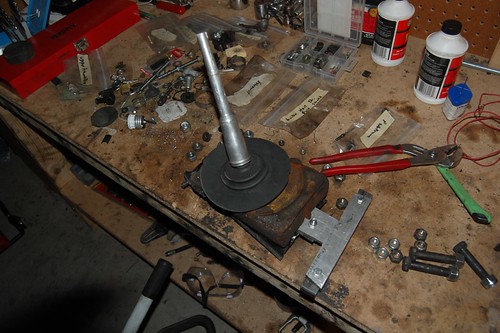
I pretty much went through the whole engine compartment between 2003 and 2006 and replaced the drivetrain between 2006 and 2008.
My goal with the engine was to replace the seals, gaskets, and hoses in order to get rid of any fluid leaks and reduce the possibility of more occurring in the future. I haven't seen any oil or coolant under the car, but it did spring a hydraulic fluid leak where the hydraulic fluid hose connects to the break booster... the only hose I didn't replace.
I had the head cleaned up and the valves and valve seals done at The Engine Shop in Longmont, CO. Sadly, they don't have their own web page, but here's Google's link for them.
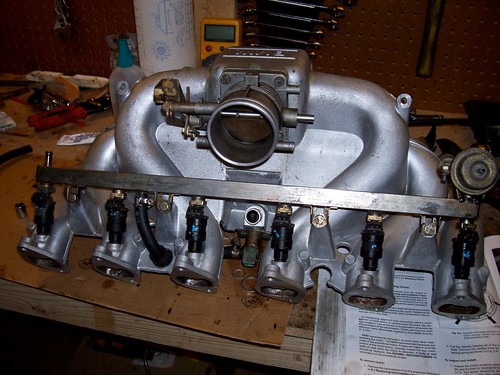
Here's a good picture of the intake manifold, which I cleaned up myself.
One of the bigger challenges was getting the transmission high enough off the ground to mate it up with the engine. I accomplished this with a ramp made out of some old 2x4s, a floor jack, and some scrap wood. I was able to put the transmission at one end of the ramp, lift the other end up and sneak the jack under it, slide the transmission forward so it was at the end near the jack, then jack it up to the level of the engine. I used scrap wood as shims under the low end of the ramp to get the ramp angle matched up to the angle that the engine was sitting at. From there, I pushed the transmission forward and wiggled it around until the input shaft engaged with the engine.
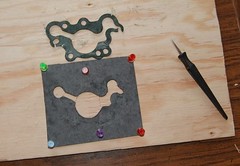
I have cut a few of my own gaskets. The one below is for the plate on the back of the head. You can see where the old one had failed on the right.
The shift console -- the assembly that holds the gear shift level in place -- for the Getrag 260 transmission originally on the car wasn't compatible with the 265 transmission, so I crafted my own. Below, you're looking at the shift level without a knob on it, and the shift console with sits on tip of the transmission, underneath the car.
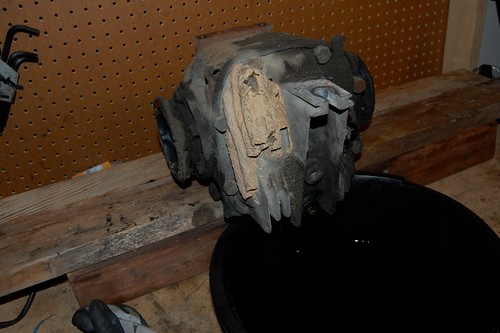
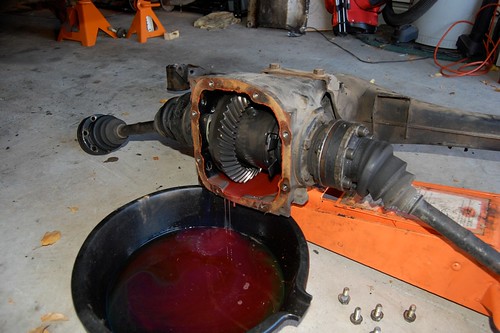
Some sort of insect nest on my old differential:
The bracket on the back of the 3.73 differential (3.73 is a gear ratio, BTW) didn't line up with the bolt hole on the car, so I had to swap the plates on the back of the two differentials.
You can see the differences here:
...and here's the new diff with the subframe and half shafts attached, ready to go back into the car:
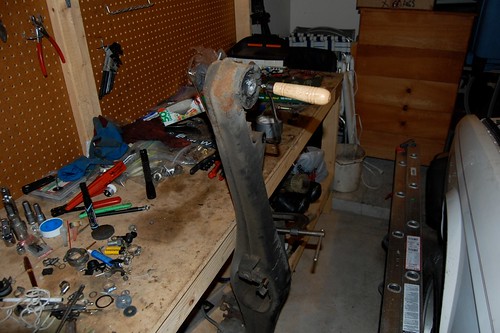
Speaking of the subframe, I also managed to replace the subframe bushings. People have done this without removing the subframe from the car, but after removing one bushing and not being able to get the new one in, I thought it would be easier if I could get the whole thing off the car and move it to where it was easier to work on. I removed the subframe and clamped it to my work bench. I used a coping saw to cut up the old bushing:
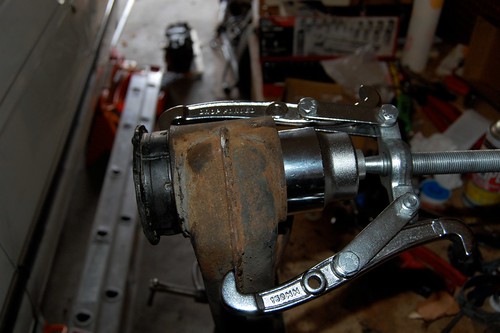
I needed to to back the new (stuck) bushing out of the subframe -- obviously, sawing it up wasn't going to work here. I found a big socket at Sears that I used to distribute the force around the edge of the bushing (where, previously, the puller was just applying force to the middle,) and used that to push it out of the subframe. This might have been easier than sawing up the old ones had I known how to do it.
And... finally, in March of 2009, the car moved under its own power. Here it is in the driveway of my apartment in Denver.
In 2009, I replaced the main board in the instrument cluster but didn't take any pictures. This fixed a problem with my temperature gauge jumping around when I hit bumps in the road. The interesting thing here is that, in contrast to what my original hypothesis was, my temp gauge problem wasn't a wiring problem, but appears to have been be a board problem. We'll keep that in mind as we move forward.
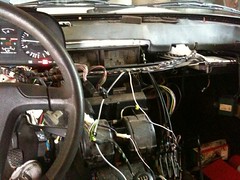
Current status
I currently have the dashboard removed and am isolating a rattle in the ventilation system. It's a little odd -- it occurs at 3000 RPM, but only when the car is moving! Of course, when I started taking things apart that were hidden in/under/behind the dash, it became obvious that every bit of foam in the car was disintegrating. In this case, it's a lot of weather-stripping-type stuff used to keep the ventilation system from leaking and losing air pressure. This isn't a big issue, but it would be nice to have adequate air pressure for the heat in the winter.
Like my temperature gauge, the warning lights turn on and off while I'm driving. BMW calls the system "active check," but what it amounts to is that there are relays and sensors all over the car that are constantly checking the light bulbs, fluid levels, and fluid pressures. If something goes wrong, a warning light comes on. Something is clearly wrong! (Just not what it says.)
There's some sort of trip computer in the car, and mine appears completely dead. I'll try to get a picture. If it weren't so retro and cool looking, I'd find a way to stick an iPod or iPhone in the space it's occupying, but I can't get over the 80s-ness of the whole thing. 7-segment display and a phone-style keypad! I'll have to find another spot for my iPhone... maybe I can stick it in the glove box and control it through the 1983 interface.
Oh yeah - no stereo.
Ugly purple window tint.
The driver seat is ripped and the foam inside has collapsed.
Headlights need to be aligned. They also seem too dim.
The AC doesn't work and blows its fuse when I turn it on.
Subscribe to:
Posts (Atom)